So, the idea of having a log where I have been at a given time or being able to show my friends where I am is quite appealing. But giving all my data to a some big corporation (regardless of the matter if this data is used there or not) isn’t.
Because of that I built my own Latitude-/Google+-Locations clone completely with free and open source components.
What you need is
- An iOS or Android device (which you carry with you)
- A Linux server (for running a MQTT broker and optional a MySQL database and a webserver with PHP support)
What I wanted to accomplish is
- Push our Location to the MQTT broker (and thus being able to share our location with other OwnTracks users on the same server).
- Store the data from the MQTT broker in a MySQL database to have a permanent log.
- Push the latest location from the MySQL to a website.
Ok, here we go:
1. Location reporting from your mobile
On my mobile I’m using OwnTracks. This requires a MQTT broker on the server side. There are quite a lot public ones of the out there, but as I said I wanted to use my own infrastructure.
The daemon I’m using for this is Mosquitto, which is bundled with the most linux distros. OwnTracks needs an encrypted connection, so you have to generate certificates (or get one from e.g. CACert.org) and chance the mosquitto.conf to activate is. You should also add an user to an mosquitto password storage for every user who will be using this server.
After that my mosquitto.conf looks like
listener 1883 localhost
listener 8883
capath /etc/mosquitto/ca_certificates
certfile /etc/mosquitto/certs/server.crt
keyfile /etc/mosquitto/certs/server.key
tls_version tlsv1
require_certificate false
allow_anonymous false
password_file /etc/mosquitto/passwd
(The first listener is one without TLS for the m2s script which I’ll be using in step 2.)
To add users you have to use
man mosquitto_passwd
Now you just have to configure your server, port, username and password in OwnTracks and you’ll already be able to share your location with other users on the same server using the app.
(OwnTrack has no option to trust unknown certificates – at least on Android. So you may be required to add the used CA to the certificate storage of your device.)
2. Generating a permanent log
To transfer the MQTT data into a MySQL I use the m2s script from the OwnTracks team. Here you just have to fill in your details in a setting.py (host, (plaintext) port, user and password for the MQTT broker and host, user, password and databasename for the MySQL) and run it.
Done. Now you have a permanent log of your location history.
(I also had to install some additional python modules to get m2s running. I don’t know if this was because of m2s itself or because of some of the additional plugins I’m using with it.)
To use the stored data you can for example use gpxexporter.py which is part of m2s and creates a gpx track out of the data.
3. Publishing your location on a website
To show my location on the web I write a small gpx track (using gpxexporter.py), push this on my webserver, take the latitude and longitude of it’s last entry (using php) and show this in an Leaflet view.
This is done with a cronjob
*/5 * * * * cd /path/to/m2s; ./gpxexporter.py -u username -d devicename -f `date --date="1 day ago" +%F` -t `date +%F` | ssh servername "cat > /path/to/web/track.gpx"
and a simple php script
<?php
$xml = simplexml_load_file('../track.gpx');
$lat = $xml->trk->trkseg->trkpt[count($xml->trk->trkseg->trkpt)-1][lat];
$lon = $xml->trk->trkseg->trkpt[count($xml->trk->trkseg->trkpt)-1][lon];
?>
<!DOCTYPE html>
<html>
<head>
<title>Locations</title>
<meta charset="utf-8" />
<meta http-equiv="refresh" content="600">
<meta name="viewport" content="width=device-width, initial-scale=1.0, maximum-scale=1.0, user-scalable=no">
<link rel="stylesheet" href="http://leafletjs.com/dist/leaflet.css" />
<style>
body {
padding: 0;
margin: 0;
}
html, body, #map {
height: 100%;
}
</style>
</head>
<body>
<div id="map"></div>
<script src="http://leafletjs.com/dist/leaflet.js"></script>
<script>
var map = L.map('map').setView([<?= $lat ?>, <?= $lon ?>], 15);
L.tileLayer('https://{s}.tiles.mapbox.com/v3/{id}/{z}/{x}/{y}.png', {
maxZoom: 18,
attribution: 'Map data © <a href="http://openstreetmap.org">OpenStreetMap</a> contributors, ' +
'<a href="http://creativecommons.org/licenses/by-sa/2.0/">CC-BY-SA</a>, ' +
'Imagery © <a href="http://mapbox.com">Mapbox</a>',
id: 'examples.map-i86knfo3'
}).addTo(map);
L.marker([<?= $lat ?>, <?= $lon ?>]).addTo(map);
</script>
</body>
</html>
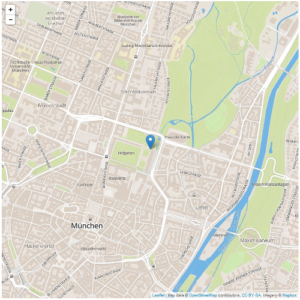
Which outputs to something like
 If you have more than one user using your server and you’d like to display all on the map, you would have to create multiple cronjobs (with different user/device entries).
(I’m quite sure that there are other, smarter ways involving less components for this out there. This was a quite fast hack which works very well for me.)
Update: It looks like mapbox regularily changes the Name/ID of it’s example map. So it would be best to create a (free) account at mapbox and change the id in my example code to your own and also add your access token.